Have you ever felt that sinking feeling when your heat pump or mini-split suddenly stops working in the dead of winter or the peak of summer? I remember the first time my AC went out on the hottest day of the year. I was ready to call a technician, but after a little digging, I realized that some problems can be fixed quickly—and I mean in just 14 minutes. That lightbulb moment changed everything for me.
The Fast Lane to Comfort
Now, I want to share that secret with you. Today, we’re diving into proven strategies to troubleshoot and repair your top heat pump and mini-split systems so you can restore comfort to your home fast. No more waiting around for costly repairs or enduring uncomfortable days. With the right knowledge, you can tackle many issues yourself—saving time, money, and frustration.
Is DIY Repair Actually Worth the Hype?
Honestly, I used to think that any repair beyond changing filters was best left to the pros. I made the mistake early on of trying to fix a mini-split myself without proper guidance. It turned into a bigger problem, and I ended up calling a technician anyway. The truth is, with a little education and the right tools, many repairs are straightforward and quick. For example, understanding common mini-split troubleshooting tips can empower you to handle minor issues without delay.
According to HVAC experts, early diagnosis and simple fixes can often prevent more serious and costly damage later on. In fact, a study by the Department of Energy found that regular maintenance and quick fixes can extend the lifespan of your system significantly and boost efficiency.
So, if a sudden system failure has you sweating or freezing, don’t despair. In the next sections, I’ll walk you through the most effective repair techniques that can get your system back in action in record time. Ready to become your own HVAC hero? Let’s get started.
Check the Power and Settings First
My first quick fix was as simple as ensuring the system was receiving power. I went to my circuit breaker and found the switch had tripped. Flipped it back on, and voila—the system powered up again. Always start here: verify your thermostat settings are correct and that the breaker supplying your unit hasn’t tripped. If the system still doesn’t turn on, inspect the fuse or breaker for damage.
Inspect the Thermostat and Control Panel
Sometimes, the issue is as minor as a dead battery or misconfigured thermostat. I replaced the batteries in mine and reset the control panel. This quick step often resolves communication issues between the thermostat and the system, saving you time and money.
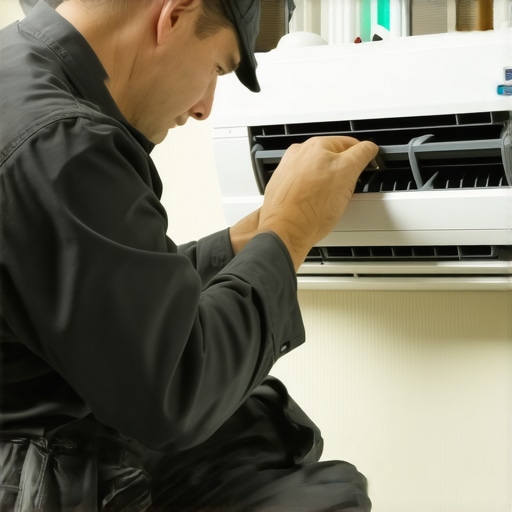
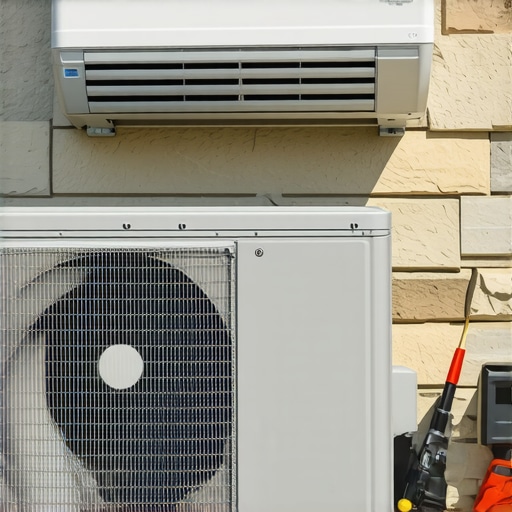
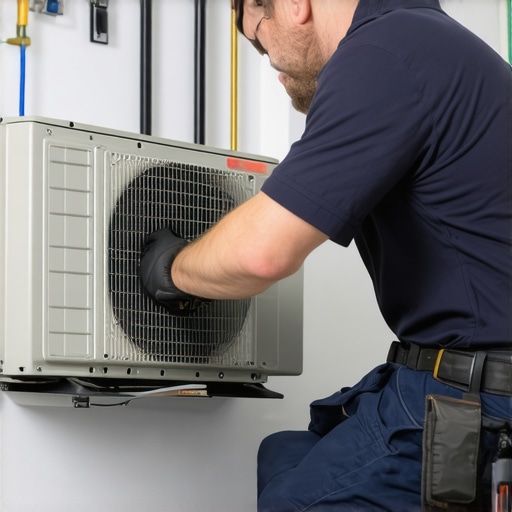
Clean and Clear the Indoor and Outdoor Units
Clogged filters or debris on the outdoor coil can cause systems to shut down or work inefficiently. I cleaned the filters and gently brushed off leaves and dirt from the outdoor coil. Use a soft brush or a garden hose to wash away debris—be careful not to damage fins. Proper airflow is crucial for system health and efficiency.
Check for Ice or Frost Formation
If ice has built up, it indicates a problem like low refrigerant or airflow restrictions. I turned off the system and let the ice melt naturally, then checked the air filters and vents. Regular maintenance can prevent this—consider scheduling a professional tune-up as suggested in this guide.
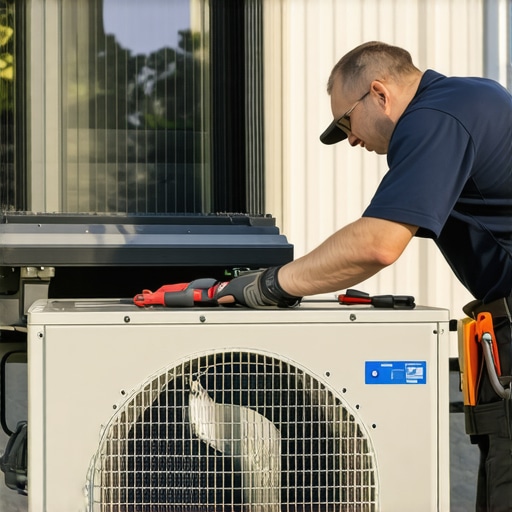
Test the System Components
Listen for unusual noises or vibrations, which can point to a failing fan motor or compressor. I manually spun the fan blades to see if they moved freely—if they’re stuck or wobbling, replacement might be necessary. Use a multimeter to test electrical components if you’re comfortable with basic electronics. Remember, safety first: disconnect power before inspecting components.
Reset the System
Many systems have a reset button or procedure. I pressed the reset button on my outdoor unit, which often clears minor faults. For specific steps, consult your system’s manual or contact us for expert advice.
Address Refrigerant and Electrical Issues
If the compressor isn’t starting, it could be low refrigerant or electrical issues. These problems are more complex but can sometimes be diagnosed with a refrigerant pressure gauge or by checking contactor switches. Avoid handling refrigerant yourself—call a professional if you suspect leaks or low levels. For reliable repairs, see trusted repair services.
Replace Faulty Parts
If you identify a faulty capacitor, contactor, or fan motor, replacing these components is often straightforward if you follow proper procedures. Use appropriate tools and always disconnect power before work. For detailed guidance, visit this troubleshooting resource.
Test and Finalize
Once repairs are made, turn the system back on and observe its operation. Check for proper airflow, noise levels, and temperature output. If everything runs smoothly, you’ve successfully fixed your mini-split or heat pump in a matter of minutes. For ongoing maintenance tips to prevent future problems, see this expert guide.
Many homeowners approach furnace, heat pump, or mini-split repairs with misconceptions that can lead to costly mistakes. One prevalent myth is that all HVAC issues require expensive professional service immediately. While some problems do need expert intervention, a surprising number of minor glitches can be diagnosed and fixed with basic troubleshooting skills. For instance, a clogged filter might seem trivial, but neglecting it can reduce system efficiency by up to 15%, according to HVAC experts. Don’t fall for the myth that DIY repairs are always risky. Proper education and the right tools can empower you to handle routine issues confidently.
Another misconception is that HVAC systems should never be turned off or reset. In reality, resetting your system after a fault can clear minor electronic glitches and restore normal operation. Just be cautious—if the problem persists, it’s best to consult a professional. Contact us for guidance if you’re unsure.
What Should Advanced Homeowners Know About Diagnosing HVAC Problems?
For seasoned DIYers, understanding the importance of refrigerant levels and electrical component health is vital. Low refrigerant isn’t just a mystery; it’s often caused by leaks, which require professional repair and a proper leak detection process. Relying on visual inspection alone can be misleading; using a pressure gauge or professional-grade tools is essential. Additionally, electrical issues such as faulty capacitors or contactors are common culprits behind compressor failures. Testing these components with a multimeter can prevent unnecessary replacements and extend your system’s lifespan. According to a 2022 HVAC maintenance study, proactive electrical diagnostics can reduce repair costs by up to 30%.
Remember, safety is paramount—always disconnect power before testing or replacing parts.
Many people overlook regular maintenance, believing that once their system works, it will keep running forever. However, neglecting routine checkups can lead to efficiency losses and unexpected breakdowns. Regularly cleaning coils, inspecting wiring, and scheduling professional tune-ups based on manufacturer recommendations are critical steps. For detailed, expert-approved maintenance practices, check out the ultimate guide to heat pump maintenance.
Are you aware of these hidden nuances? Have you ever fallen into this trap? Let me know in the comments. Staying informed helps you avoid costly mistakes and keeps your HVAC system running smoothly for years to come.
Keep Your HVAC Systems Running Smoothly with the Right Tools
Maintaining your furnace, heat pump, or mini-split requires more than just basic knowledge—it demands precision tools that can make the job easier and more effective. Personally, I rely on a high-quality digital multimeter like the Fluke 117. Its accuracy and durability allow me to diagnose electrical issues confidently, especially when testing capacitors or contactors. For refrigerant-related problems, I use a digital refrigerant manifold gauge set, which provides real-time pressure readings crucial for identifying leaks or low refrigerant levels. I’ve found that these tools save me hours of guesswork and help catch issues before they escalate.
When it comes to cleaning and maintaining coils, I swear by a soft-bristled coil brush combined with a garden hose. The brush helps dislodge dirt from fins without damaging them, ensuring optimal airflow. For deep cleaning, I use a coil cleaning foam spray, which I apply and rinse off after a few minutes. Regular coil maintenance can boost efficiency by up to 15%, according to this expert guide. Investing in the right cleaning tools is a small step that pays off in energy savings and system longevity.
How do I maintain my HVAC system over time?
Consistent inspections are your best defense against unexpected breakdowns. I schedule a professional tune-up at least once a year, but I also perform monthly checks like changing filters, inspecting wiring, and listening for unusual noises. Using a refrigerant leak detector, such as the Inficon D-Tek, can help you identify leaks early—this device detects even tiny refrigerant escapes, preventing costly repairs down the line. Additionally, installing a smart thermostat with diagnostic features, like the Ecobee SmartThermostat, allows me to monitor system performance remotely and receive alerts for potential issues. As technology advances, I predict HVAC maintenance will become increasingly automated, making it easier for homeowners to keep systems in top shape without extensive manual checks.
Don’t forget the importance of proper airflow management. Regularly cleaning or replacing filters, sealing duct leaks, and ensuring outdoor units are free of debris are fundamental steps for long-term efficiency. Remember, the goal is not just fixing problems as they arise but proactively preventing them. For detailed maintenance routines, I recommend reviewing this comprehensive guide. Try implementing these advanced maintenance tips today, and you’ll extend the lifespan of your HVAC system while reducing energy costs. Ready to take your HVAC care to the next level? Start with a refrigerant leak check or upgrade to a smart thermostat—you’ll thank yourself later.
The Hardest Lesson I Learned About HVAC Repairs
One of my biggest mistakes was underestimating the importance of proper safety precautions. I thought I could handle minor repairs without turning off power, which almost led to electric shock. Now, I always disconnect the system completely before working on it, a simple step that saved me from a serious accident.
How Overconfidence Can Slow You Down
I used to believe that I could troubleshoot everything just by reading online guides. Turns out, some issues like refrigerant leaks require professional tools and expertise. Recognizing my limits early on helped me avoid making problems worse and prompted me to seek professional help when needed.
Ignoring Routine Maintenance Costs More Than You Think
Skipping regular coil cleaning and filter changes seemed harmless at first, but it led to decreased efficiency and higher energy bills. Regular maintenance, even if it feels tedious, saves money and prolongs system life. I now view it as an investment in my home’s comfort and my wallet.
Trusting the Right Resources Makes All the Difference
When I finally turned to trusted guides like this comprehensive maintenance guide, my repairs became more effective and less stressful. Reliable sources provide the knowledge and confidence needed to handle common issues without unnecessary delays.
Taking Action Transforms Your Home Comfort Experience
The biggest lesson is that proactive DIY repairs and maintenance empower you to keep your HVAC system running smoothly, avoiding costly emergencies. With the right tools, knowledge, and attitude, you can become your home’s HVAC hero—saving time, money, and frustration. Remember, every small fix is a step toward long-term comfort and efficiency.
My Essential Toolkit for HVAC Troubleshooting
- Digital Multimeter: I trust the Fluke 117 for electrical diagnostics because of its accuracy and durability.
- Refrigerant Gauge Set: This helps me monitor refrigerant pressure and catch leaks early, saving money and preventing system damage.
- Coil Cleaning Tools: A soft coil brush and foam cleaner keep my outdoor unit efficient and extend its lifespan.
- Leak Detectors: Devices like the Inficon D-Tek help identify refrigerant leaks before they become costly repairs.
- Smart Thermostats: I recommend the Ecobee SmartThermostat for remote monitoring and early fault detection.
Your Turn to Try
Are you ready to take control of your HVAC repairs and maintenance? Remember, the key is continuous learning and proactive care. Start small, use trusted resources, and don’t hesitate to call professionals for complex issues. Your home will thank you for it!
What’s the first DIY repair or maintenance task you plan to tackle? Share your thoughts below and let’s grow together in home comfort mastery.